How to batch edit devices
Situations where you need to manage the devices that are used for access control and time & attendance will happen all the time. The network environment might have changed, or you might need to add a specific user to have privileges to control the device itself. To minimize the work for the administrator, BioStar 2 provides a feature where you can batch edit some features of the device.
How to enter the menu for batch edit
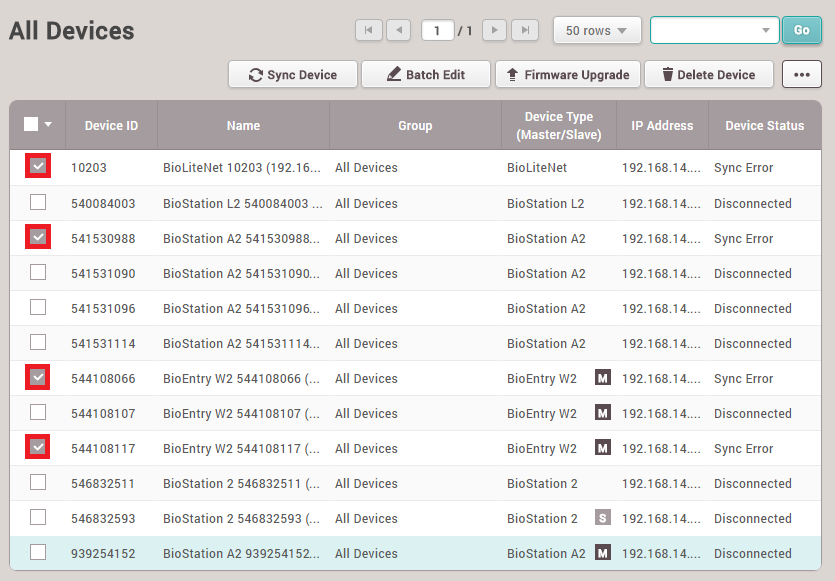
1. Select the devices to be edited.

2. Click the 'Batch Edit' button.

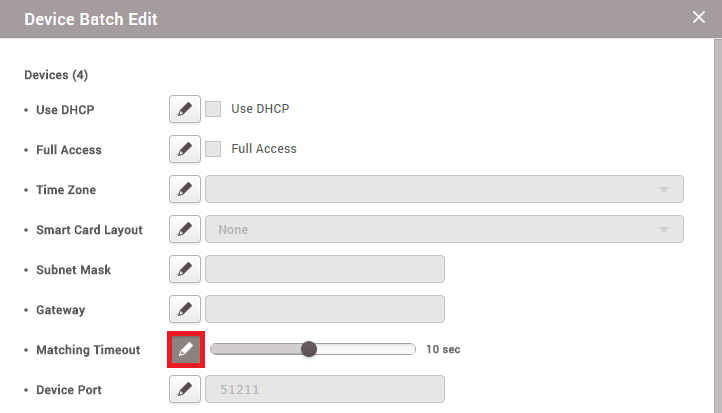
3. A screen will appear that will show all editable options.

4. To modify an option, click the pencil-shaped icon and change the values.

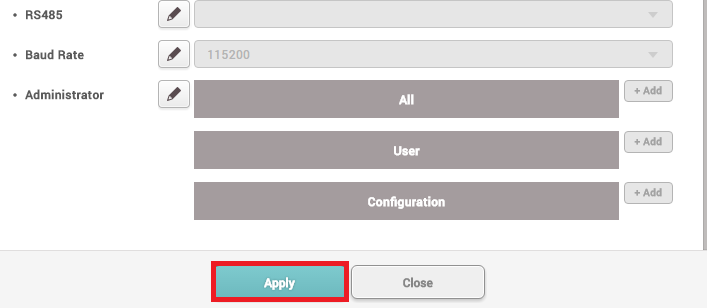
5. After changing the configuration, click the 'Apply' button.

Options that can be modified by batch
1. Use DHCP - Configure the device to get the address from the DHCP server or to allocate a static IP manually.
2. Use Server Matching – Configure the device to perform authentication matching after the user data is stored in the server.
3. Full Access - Configure the device to allow all authentications or to work based on the access group configurations.
4. Time Zone - Configure the device's time zone.
5. Daylight Saving Time – Configure the device to have the Daylight-Saving Time applied to its time.
6. Smart Card Layout - Configure the device's smart card layout which will be used to read the smart card issued from BioStar 2.
7. Subnet Mask - Configure the device's subnet mask.
8. Gateway - Configure the device's gateway address.
9. Matching Timeout - Configure the maximum time for the device to match the scanned fingerprint template with the stored templates.
10. Device Port - Configure the port that will be used to communicate when using the server → device connection.
11. Connection Mode - Configure the connection mode to device → server or to server → device.
12. Server Address - Configure the server address the device will try to connect when it's set to device → server mode.
13. RS485 - Configure the RS-485 mode of the device to master, default, or slave.
14. Buad Rate - Configure the baud rate to be used when communicating via RS-485.
15. Administrator - Configure a user that will have administrator privilege on the device.
16. Screensaver – Configure the device to have the screensaver.
17. Thermal Camera Use – Configure the device whether to use the thermal camera or not.
18. Threshold Temp – Configure the device to have the threshold for the temperature measured by the user.
19. Temp. Correction – Configure the device to have the temperature correction for the temperature measured by the user.
20. Thermal & Mask Check Mode – Configure the device to check the thermal status & Mask Check option for authentication.