Table of Contents
How to use AXIS NVR in BioStar
We have integrated some IP cameras and NVR in our system. This way we can offer our customers with Real time management: When there is a specific access control event (for example “Door Open”) then we can record the dedicated video or take picture of the event. In this document, we would like to introduce how to use AXIS NVR in BioStar.
Installation of AXIS NVR SDK
Lift I/O and devices are connected by RS485 cable. Please see the actual wiring below.
1. The AXIS Camera Station S/W should be installed which supports NVR function.
2. AXIS Camera Station SDK should be installed in the PC where BioStar Client is installed.

Please purchase the AXIS Camera Station S/W from the AXIS distributor. AXIS Camera Station SDK is included in the BioStar installation CD. You can get the latest version from the AXIS distributor.
How to set the AXIS Camera Station Server
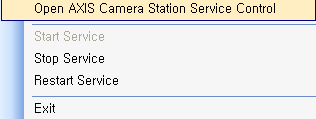
1. Select Try Icon and run AXIS Camera Server Control.
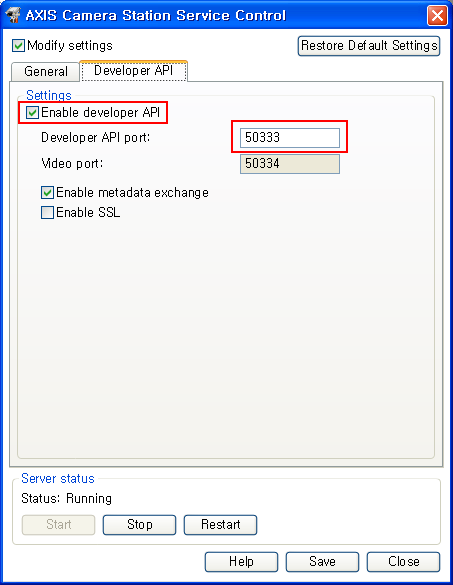
2. Go to Developer API tab and enable developer API. Check the developer API port.
How to set AXIS NVR information in BioStar
1. Insert the basic information of NVR.
| Name | Type the Alias of the AXIS NVR |
|---|---|
| Type | Choose AXIS |
| Model | Fix as AXIS |
| IP Address | Input the IP address of the AXIS NVR. If you use Local Server, please input the IP address of the Local system. |
| Port | Input Developer API Port. Default is 50333. |
| User name | Input the user ID of log in account of AXIS NVR. If log on as Current User, please input Windows account ID. |
| Password | Input password of the log in account of AXIS NVR. If log on as current user, please input Windows account password. |

2. Add the devices you wish to take video recordings.

Reference – How to configure the AXIS NVR
AXIS NVR is the AXIS Camera Station Client program. If you log in properly, you can see the screen as below. Please use the same account that you use in BioStar. Please refer to blow.

1. Select the AXIS NVR and input the address.
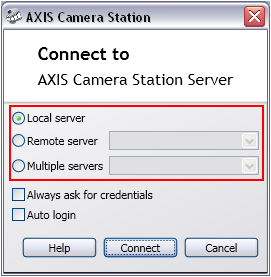
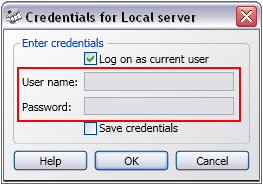
2. Select the way to log in to AXIS NVR and input the log in account (ID/Password).
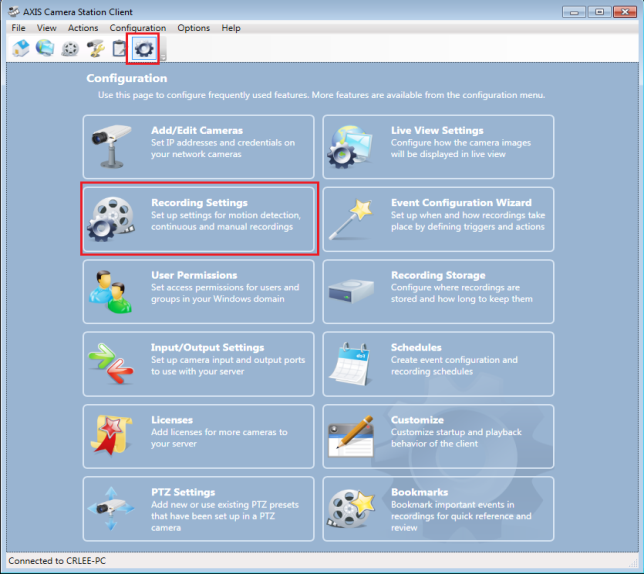
3. Configure the recording settings. Go to Settings and click Recording Settings as below.
4. Click Motion Detection to configure the settings.
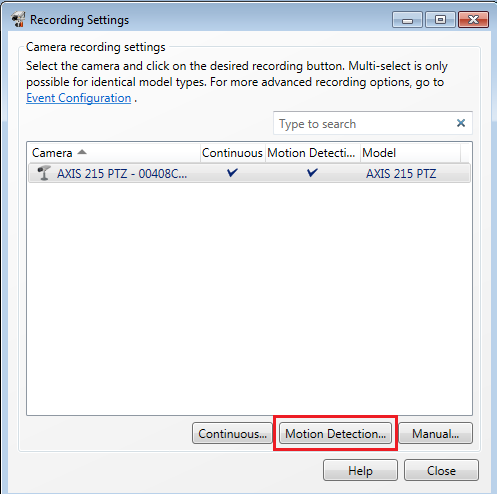
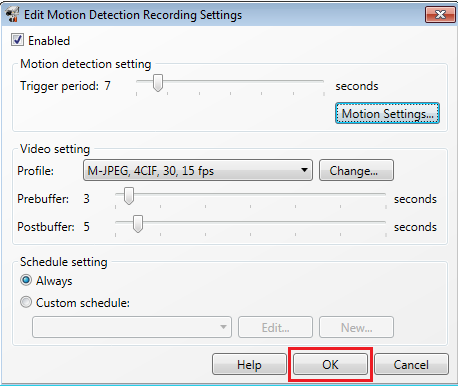
5. Configure the Motion Detection Recording Settings as you desire.
