Table of Contents
BioStar 2 API Quick Start Guide
Introduction
There are two ways to utilize BioStar API. One is called Web API(via BioStar Cloud Server) and Another one is called Local API. We recommend that you should use Local API. After you install BioStar 2 API Server, you can see the documentation of BioStar API which provides more detailed information on how to use BioStar API.
In this article, I’m going to take a closer look at a sample application that I made for those who are familiar with C# or standalone Windows application. Since BioStar API is RESTful API, those who are not familiar with RESTful API might have difficulties implementing their own applications with BioStar API. Therefore, I’d like to guide them to kick-start their development with the sample application in this article.
Features
This sample application is a Visual C# console application and includes four basic functions: login, user creation, access group retrieval and log retrieval.
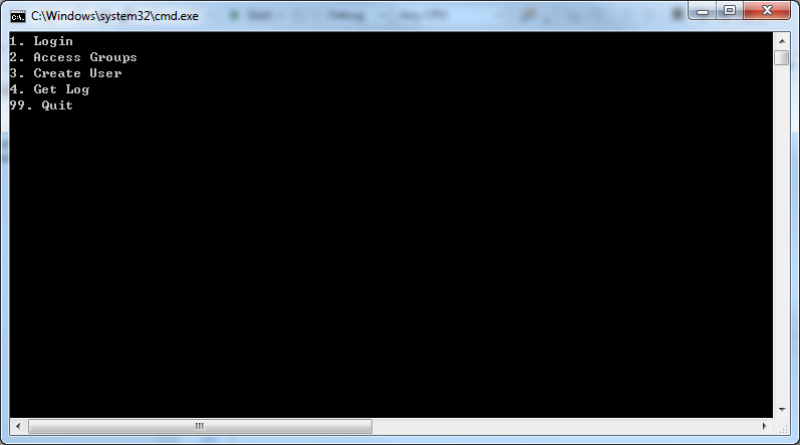
[Figure 1. When you’ve launched the sample application]
First, you have to log in before using any other functions. If you type ‘1’ and press Enter, the sample application logs into your local BioStar server through BioStar API server.
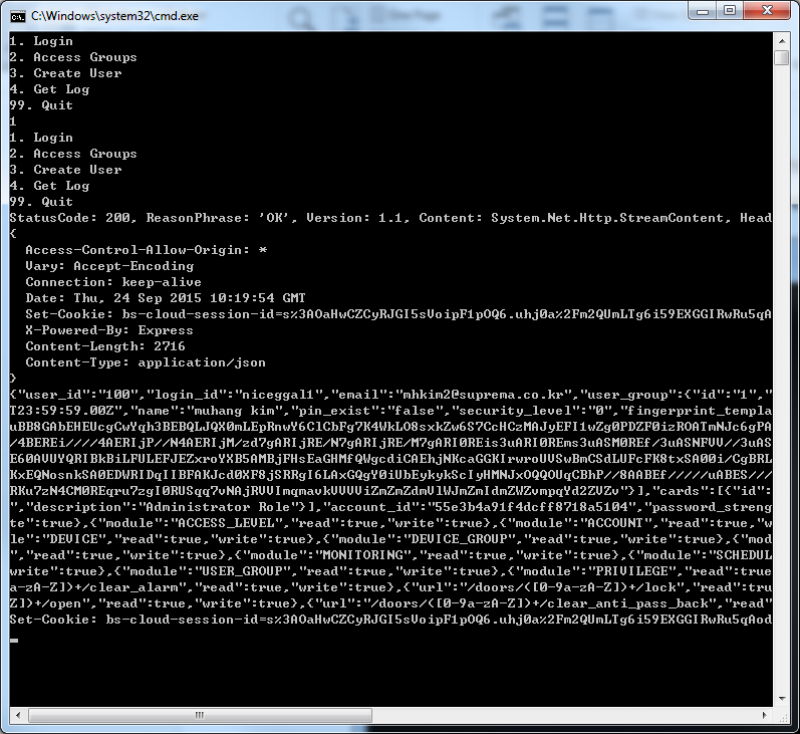
[Figure 2. After logging in]
When successfully logged in, you get the information of the user that you used for logging in. The user data is in the JSON format and includes very detailed data including fingerprint templates as you can see from Figure 2. Now that we’ve logged in, we can use other functions. In order to retrieve access groups, type “2” and press Enter.
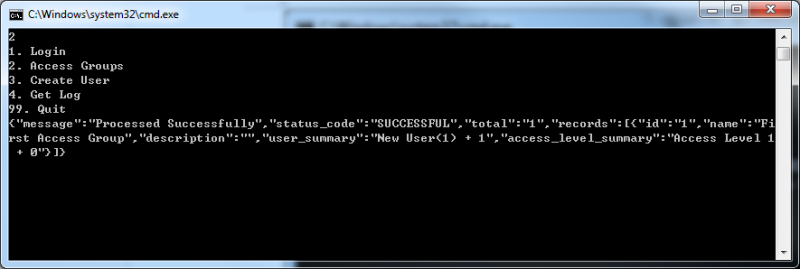
[Figure 3. Retrieving access groups]
As you can see from the screenshot, there is only one access group in BioStar 2 Server and the name of the access group is “First Access Group” and if you look at the “user_summary” property, you can notice that it has two users. Now type “3” and press Enter to create a new user. You will be asked to enter the user ID. I entered “98” as user ID and got the success message from the server.
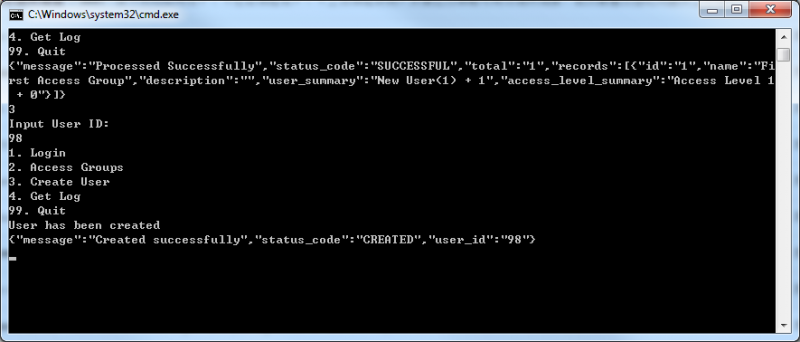
[Figure 4. Creating a new user]
Lastly, let’s retrieve log events from the server. Type “4” and press Enter and you will get log data from the server as shown in the screenshot below:
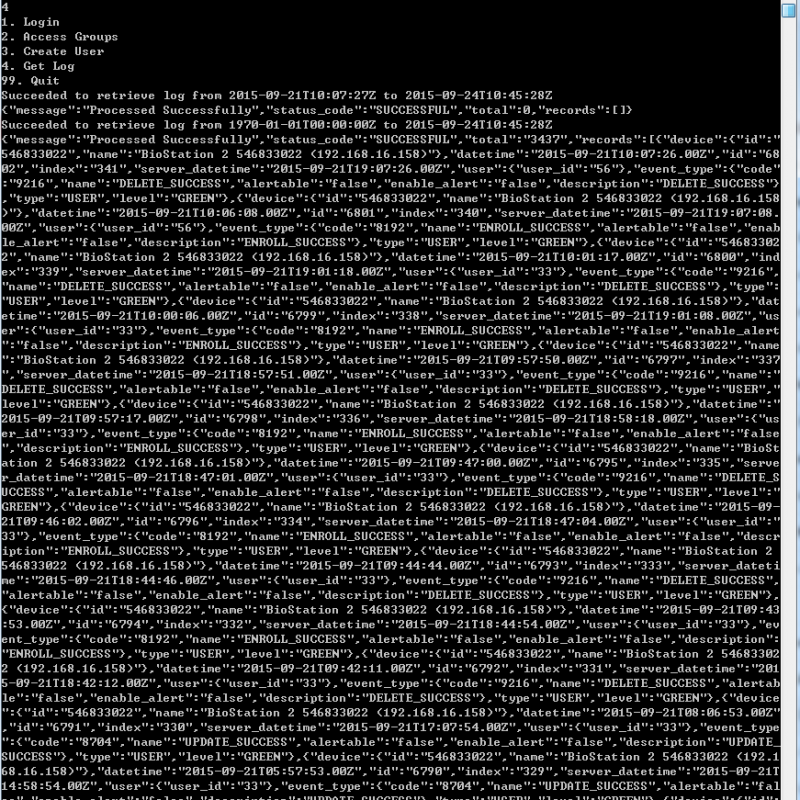
[Figure 5. Getting log list]
Analysis of the source code
1. Log in
The most important part in this sample application is log-in. Let’s take a look at the function below:
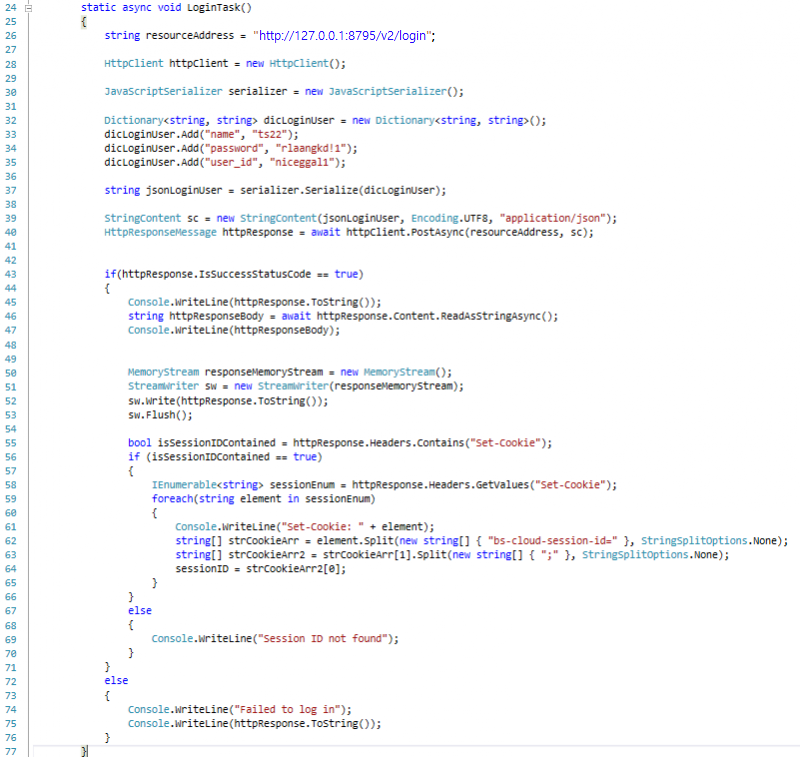
- Line 26: This is the URL that we are using to log in to your local BioStar server. In case of Local API, “http://127.0.0.1:8795/v2/” is prefix. “login” after the prefix indicates a behavior or action we want to take.
- Line 27: In this sample code, we use class HttpClient to send a request and receive a response from the BioStar Cloud.
- Line 30: Class JavaScriptSerializer is needed to convert the data into JSON formatted data or parse the JSON formatted data into any format you want.
- Line 32-35: These lines creates a dictionary which consists of a string key and a string value. Three parameters are essential: your subdomain name, ID and password. The “name” field is for the subdomain name, so set this field to your subdomain name.
- Line 37: This line converts the dictionary to a JSON formatted string.
- Line 39: This line sets the JSON formatted string as the HTTP request content, UTF8 as encoding option, and JSON as media type.
- Line 40: We use HTTP POST method to make a HTTP request for login.
- Line 45-53: We output the content of the HTTP response for debugging purposes.
- Line 55-65: If the login information is valid, we receive the session information from the server. Every time we make an API call, we have to put that session information in the HTTP header. So, line 55 to 65 extracts the session information from the HTTP response header for later use.
2. Retrieving access groups
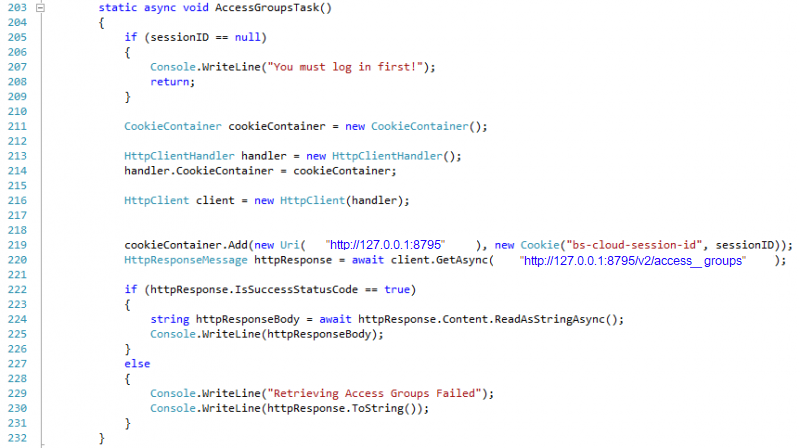
- Line 205-209: We first need to check if the login was successfully made and the session ID was stored.
- Line 211: We use class CookieContainer to send the session ID information to the BioStar server.
- Line 219: When putting the session ID in the cookie, we have to specify the URI.
- Line 220: Retrieving access groups should be done via HTTP GET method.
3. Retrieving events
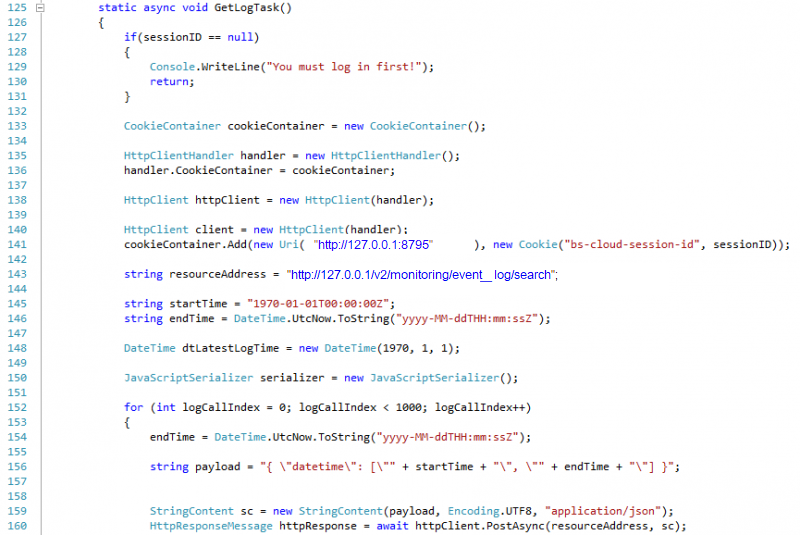
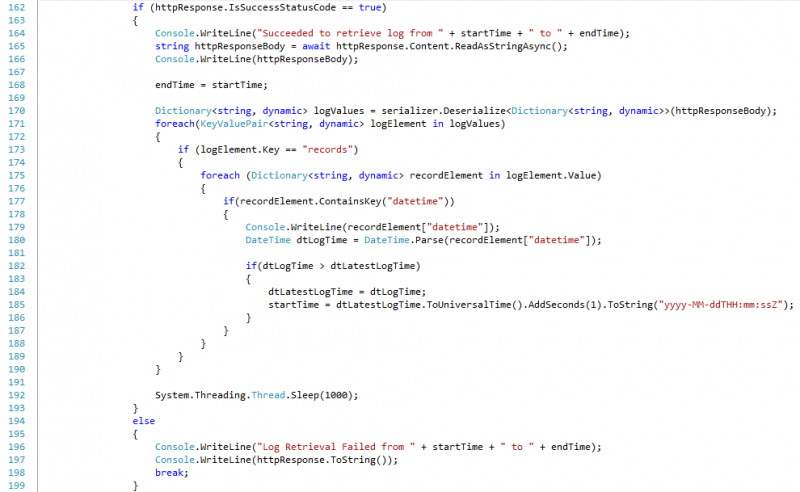
- Line 152: We use the For loop to repeatedly retrieve the events from the server at an interval.
- Line 154-156: When retrieving the events from the server, we have to specify the start time and end time. This time, rather than using class Dictionary, we build a JSON formatted string manually for demonstration purposes.
- Line 170-188: We use class Dictionary with a string key and a dynamic value to parse the JSON formatted data into a dictionary data structure. Since the events are in the form of an array, we have to use dynamic type of value in the dictionary.
4. Creating a user
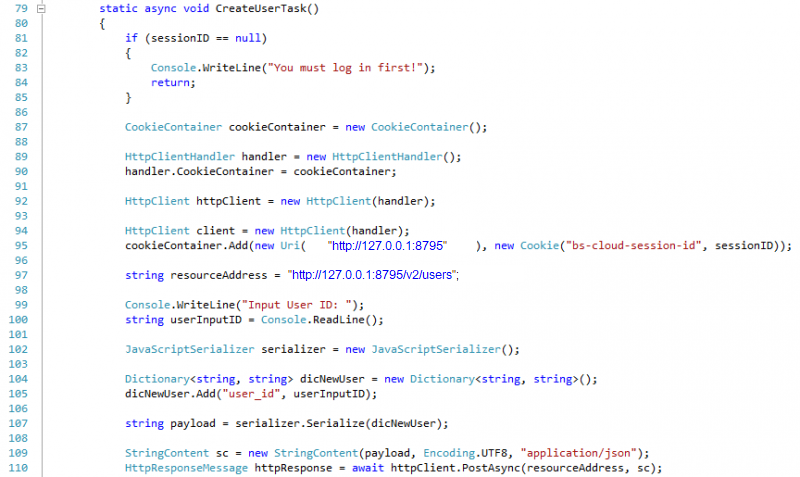
- Line 99-100: We receive a user input for the ID of a new user.
- Line 104-105: The only mandatory property that we have to provide when creating a new user is user ID.
Conclusion
So far, we have taken a brief look at how we can utilize BioStar API. Much of this article is not BioStar API specific. Rather, it’s about basic usage of class HttpClient and what to do to use Local API. Therefore, even if you’re not familiar with using BioStar API, I believe you can kick start on how to use BioStar API with this article. For more detailed information on BioStar API, See the documentation about Local API after installing BioStar 2 API Server: http://127.0.0.1:8795/v2/docs/