Table of Contents
How to configure Trigger and Action on Setting
The trigger & action feature is used when you would like to send a custom output signal from a device or send an email to the administrator based on the occurrence of an alarm event.
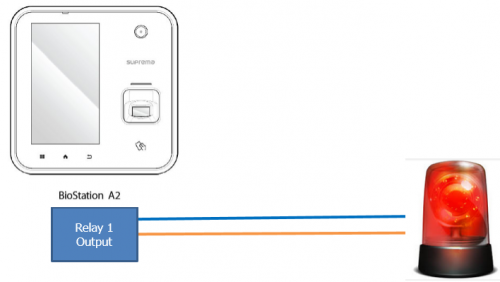
For instance, you can use this feature to trigger your alarm lamp to go on simultaneously when a forced door open alarm goes on. The system can also simultaneously send an email to the administrator as well.
Available Triggers
Below is the full list of events that are available for triggers on the setting menu. [Available on BioStar 2 Version 2.9.0 ]
Available events for Device:
- AC Power Failure
- Supervised Input (Open)
- Supervised Input (Short)
- Tamper on
- RS-485 disconnected
- RTSP disconnected
- RTSP connected
- Device restarted
- Device Disconnection Detected
- 1:1 authentication succeeded (ID + PIN)
- 1:1 authentication succeeded (ID + Fingerprint)
- 1:1 authentication succeeded (ID + Fingerprint + PIN)
- 1:1 authentication succeeded (ID + Face)
- 1:1 authentication succeeded (ID + Face + PIN)
- 1:1 authentication succeeded (Card)
- 1:1 authentication succeeded (Card + PIN)
- 1:1 authentication succeeded (Card + Fingerprint)
- 1:1 authentication succeeded (Card + Fingerprint + PIN)
- 1:1 authentication succeeded (Card + Face)
- 1:1 authentication succeeded (Card + Face + PIN)
- 1:1 authentication succeeded (Card + Face + Fingerprint)
- 1:1 authentication succeeded (Card + Fingerprint + Face)
- 1:1 authentication succeeded (ID + Face + Fingerprint)
- 1:1 authentication succeeded (ID + Fingerprint + Face)
- 1:1 authentication succeeded (Mobile Card)
- 1:1 authentication succeeded (Mobile Card + PIN)
- 1:1 authentication succeeded (Mobile Card + Fingerprint)
- 1:1 authentication succeeded (Mobile Card + Fingerprint + PIN)
- 1:1 authentication succeeded (Mobile Card + Face)
- 1:1 authentication succeeded (Mobile Card + Face + PIN)
- 1:1 authentication succeeded (Mobile Card + Face + Fingerprint)
- 1:1 authentication succeeded (Mobile Card + Fingerprint + Face)
- 1:1 authentication failed (Mobile Card)
- 1:1 duress authentication succeeded (Card + Fingerprint)
- 1:1 duress authentication succeeded (Card + Fingerprint + PIN)
- 1:1 duress authentication succeeded (Card + Face + Fingerprint)
- 1:1 duress authentication succeeded (Card +Fingerprint + Face)
- 1:1 duress authentication succeeded (ID + Face + Fingerprint)
- 1:1 duress authentication succeeded (ID + Fingerprint + Face)
- 1:1 duress authentication succeeded (Mobile Card + Fingerprint)
- 1:1 duress authentication succeeded (Mobile Card + Fingerprint + PIN)
- 1:1 duress authentication succeeded (Mobile Card + Face + Fingerprint)
- 1:1 authentication succeeded (Mobile Card + Fingerprint + Face)
- 1: N authentication succeeded (Fingerprint)
- 1: N authentication succeeded (Fingerprint + PIN)
- 1: N authentication succeeded (Face)
- 1: N authentication succeeded (Face + PIN)
- 1: N authentication succeeded (Face + Fingerprint)
- 1: N authentication succeeded (Face + Fingerprint + PIN)
- 1: N authentication succeeded (Fingerprint + Face)
- 1: N authentication succeeded (Fingerprint + Face +PIN)
- 1: N duress authentication succeeded (Fingerprint)
- 1: N duress authentication succeeded (Fingerprint + PIN)
- 1: N duress authentication succeeded (Face + Fingerprint)
- 1: N duress authentication succeeded (Face + Fingerprint + PIN)
- 1: N duress authentication succeeded (Fingerprint + Face)
- 1: N duress authentication succeeded (Fingerprint + Face + PIN)
- Dual authentication succeeded
- Access denied (Invalid access group)
- Access denied (Disabled user)
- Access denied (Invalid period)
- Access denied (Blacklist)
- Fake Fingerprint Detected
- Access denied (Anti-tailgating)
- Access denied (Exceeded threshold temp.)
- Access denied (Temp. Not measured correctly)
- Access denied (Mask not detected)
- Access granted (Check only)
- Access granted (Soft temp violation on check only)
- Access granted (Soft mask violation on check only)
- Access granted (Soft temp and mask violation on check only)
- Access denied (Exceeded threshold temp. On check only)
- Access denied (Temp. Not measured correctly)
- Access denied (Mask not detected on check only)
- Abnormal temp. detected (Exceeded threshold temp.)
- Mask not detected
Available events for Door:
- Held door open alarmed: can be used after setting Door>Alarm>Held Open
- Forced door open alarmed: can be used after setting Door>Alarm>Forced Open
- Held door opened: can be used after setting Door>Door Sensor
- Forced door opened: can be used after setting Door>Door Sensor
Available events for Zone:
- Muster zone alarm detected
- Occupancy Limit Violation (Count Full)
- Interlock door open denied alarm (Occupied)
- Interlock door open denied alarm
- Intrusion alarm detected
- Occupancy Count Alert 2 Detected
- Occupancy Count Alert 1 Detected
* Exit Occurred While Occupancy Count Zero
- Occupancy Availability Recovered
- Occupancy Full Detected
* Scheduled lock zone alarm detected
- Fire alarm zone alarm detected
- Anti-passback zone alarm detected
Setting Up a Custom Signal Output
In the scenario below, we will send a custom signal from BioStation A2 Device when there is a forced opened trigger event.
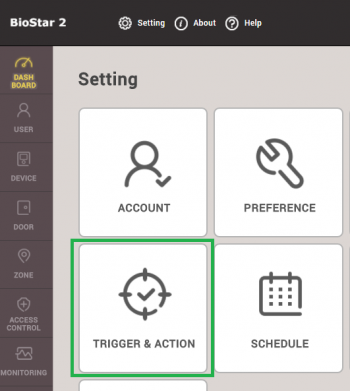
1. Click Setting → TRIGGER & ACTION.
2. Click ADD TRIGGER & ACTION.

3. Enter a name for this trigger on the Name textbox.
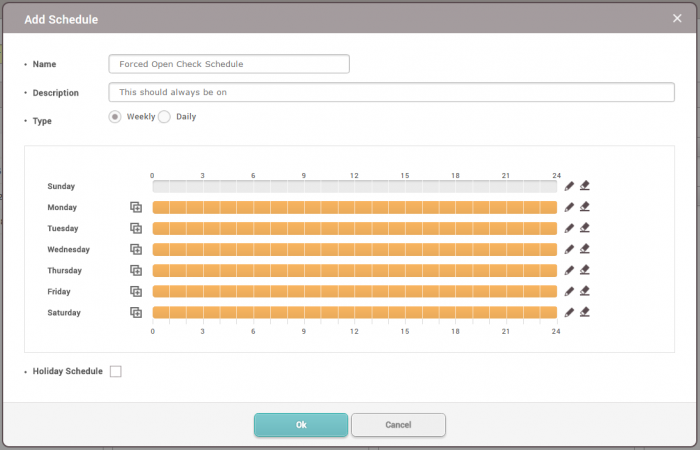
4. Click on the schedule drop box. Click + Add Schedule. If you have a pre-configured schedule, you can use that one by selecting it.

5. Configure the schedule as necessary and click Ok. In this case, I would like the trigger to be on all day except for Sunday.
6. Now select the newly created schedule on the Schedule drop box.
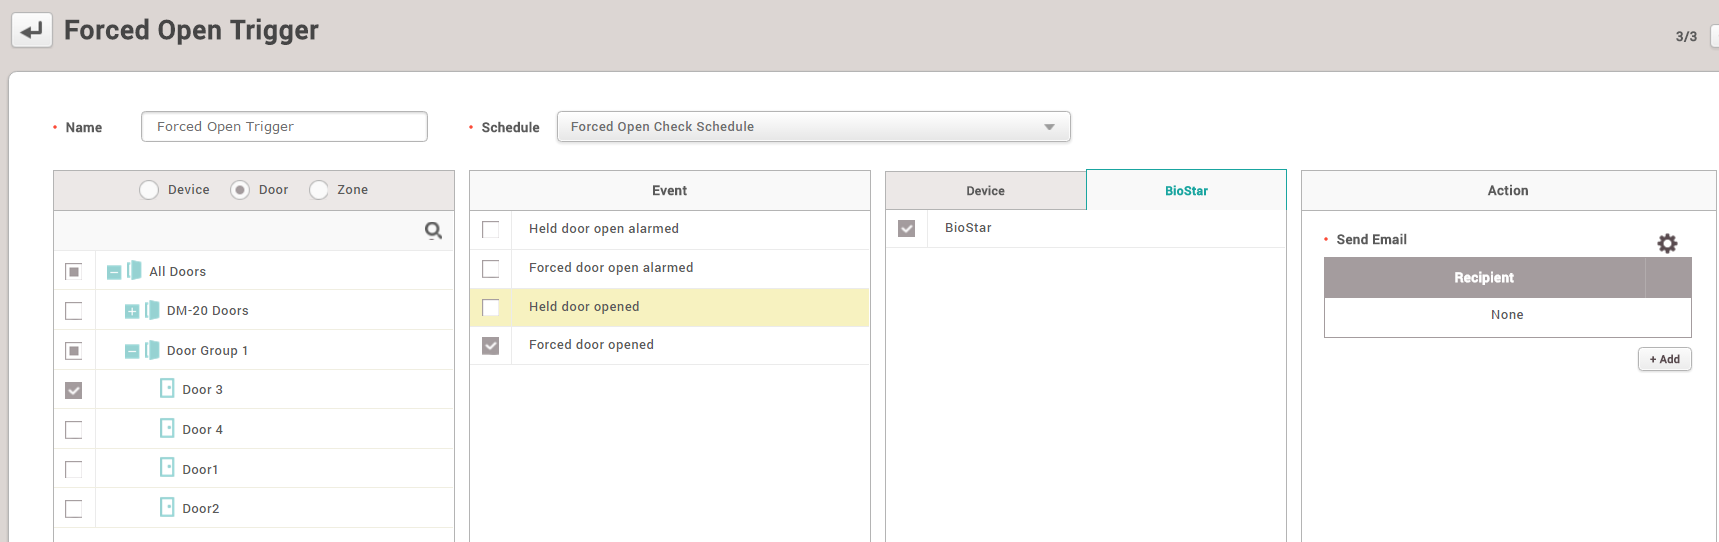
7. Select the Door radio button.
8. Select the door this will affect. The BioStation A2 Device is installed on Door 3 in this example.
9. Check Forced door opened.
10. Select your device (BioStation A2).
11. Relay 0 is already used for the door lock so relay 1 will be used for the output.

12. Click on the Signal drop down box.
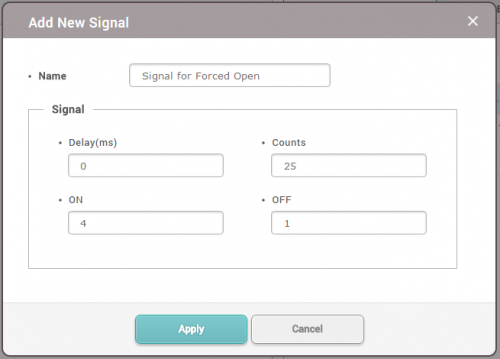
13. Click Add Signal.
14. Fill in the details as desired and click Apply.
15.Click on the Signal drop box and select the signal you just created and click Apply.
16. Now when there is a forced door open event, the custom signal is sent to relay 1.

Setting Up an Email Alert on BioStar
1. Click Setting → TRIGGER & ACTION.
2. Click on your desired trigger.
3. On Device / BioStar tab, click BioStar and check BioStar.
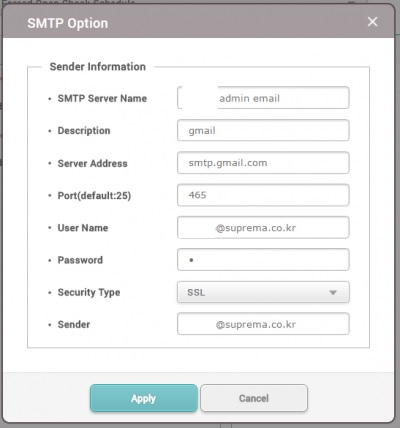
4. Click on the Gear icon on the action tab to setup your email.

5. Set up your SMTP. If you are unsure what the settings are, please follow this article → How to configure SMTP and Test the recipient address.
6. Add a Recipient and click Apply.

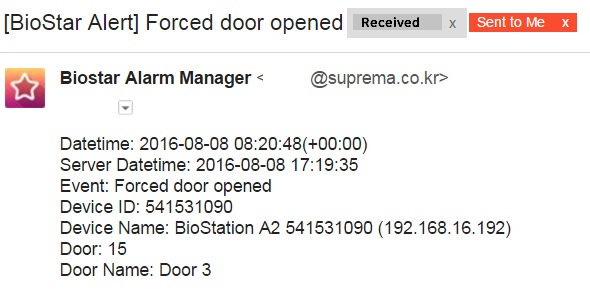
7. Now create a forced door open event.

8. The administrator will receive an alert email.